How to make a selection for retouching?
Use the proofing email, sign in with the same email from your appointment, flag the images you want retouched, and send the finished selection to the photographer.

Step-by-step retouching selection walkthrough
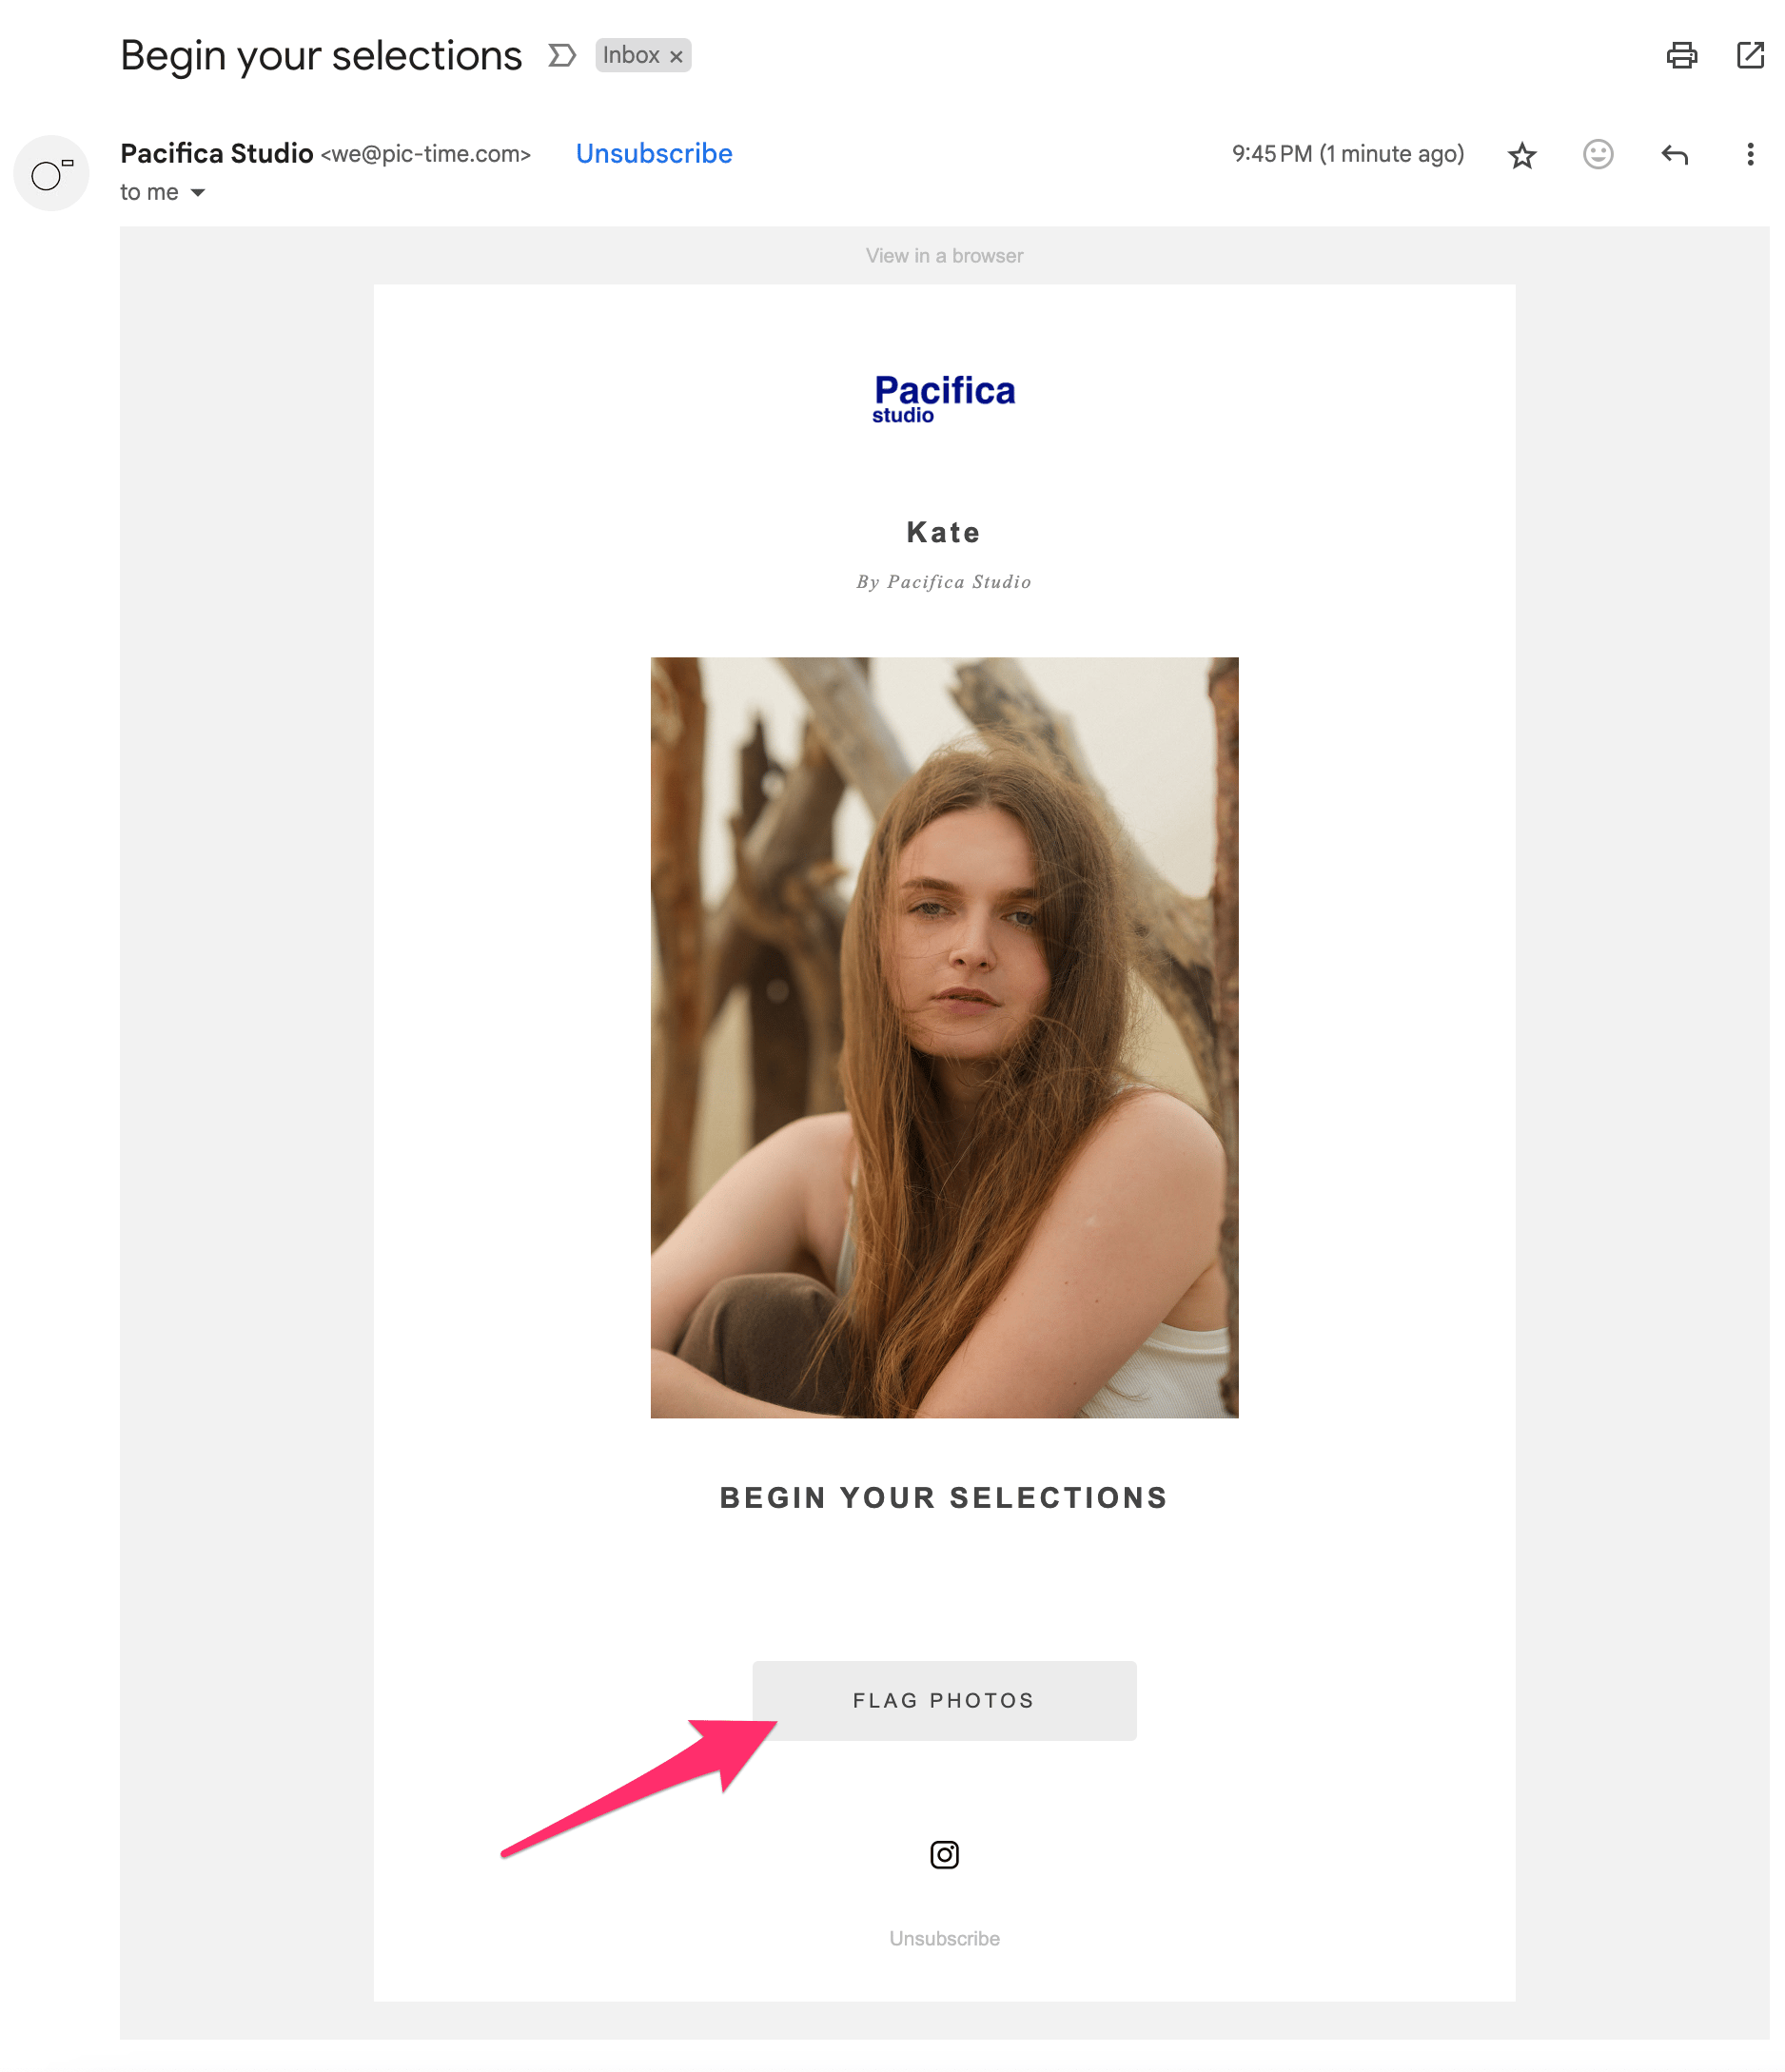
Step 1. Open the selection email
After your session, Pacifica Studio sends an email to the address used for your appointment confirmation. That email is the starting point for selecting extra retouching.
- Check your inbox for “Begin your selections”Search your inbox first, then check spam or promotions if it does not appear right away.
- Click “Flag Photos”That button opens the gallery where you can mark the images you want us to retouch.
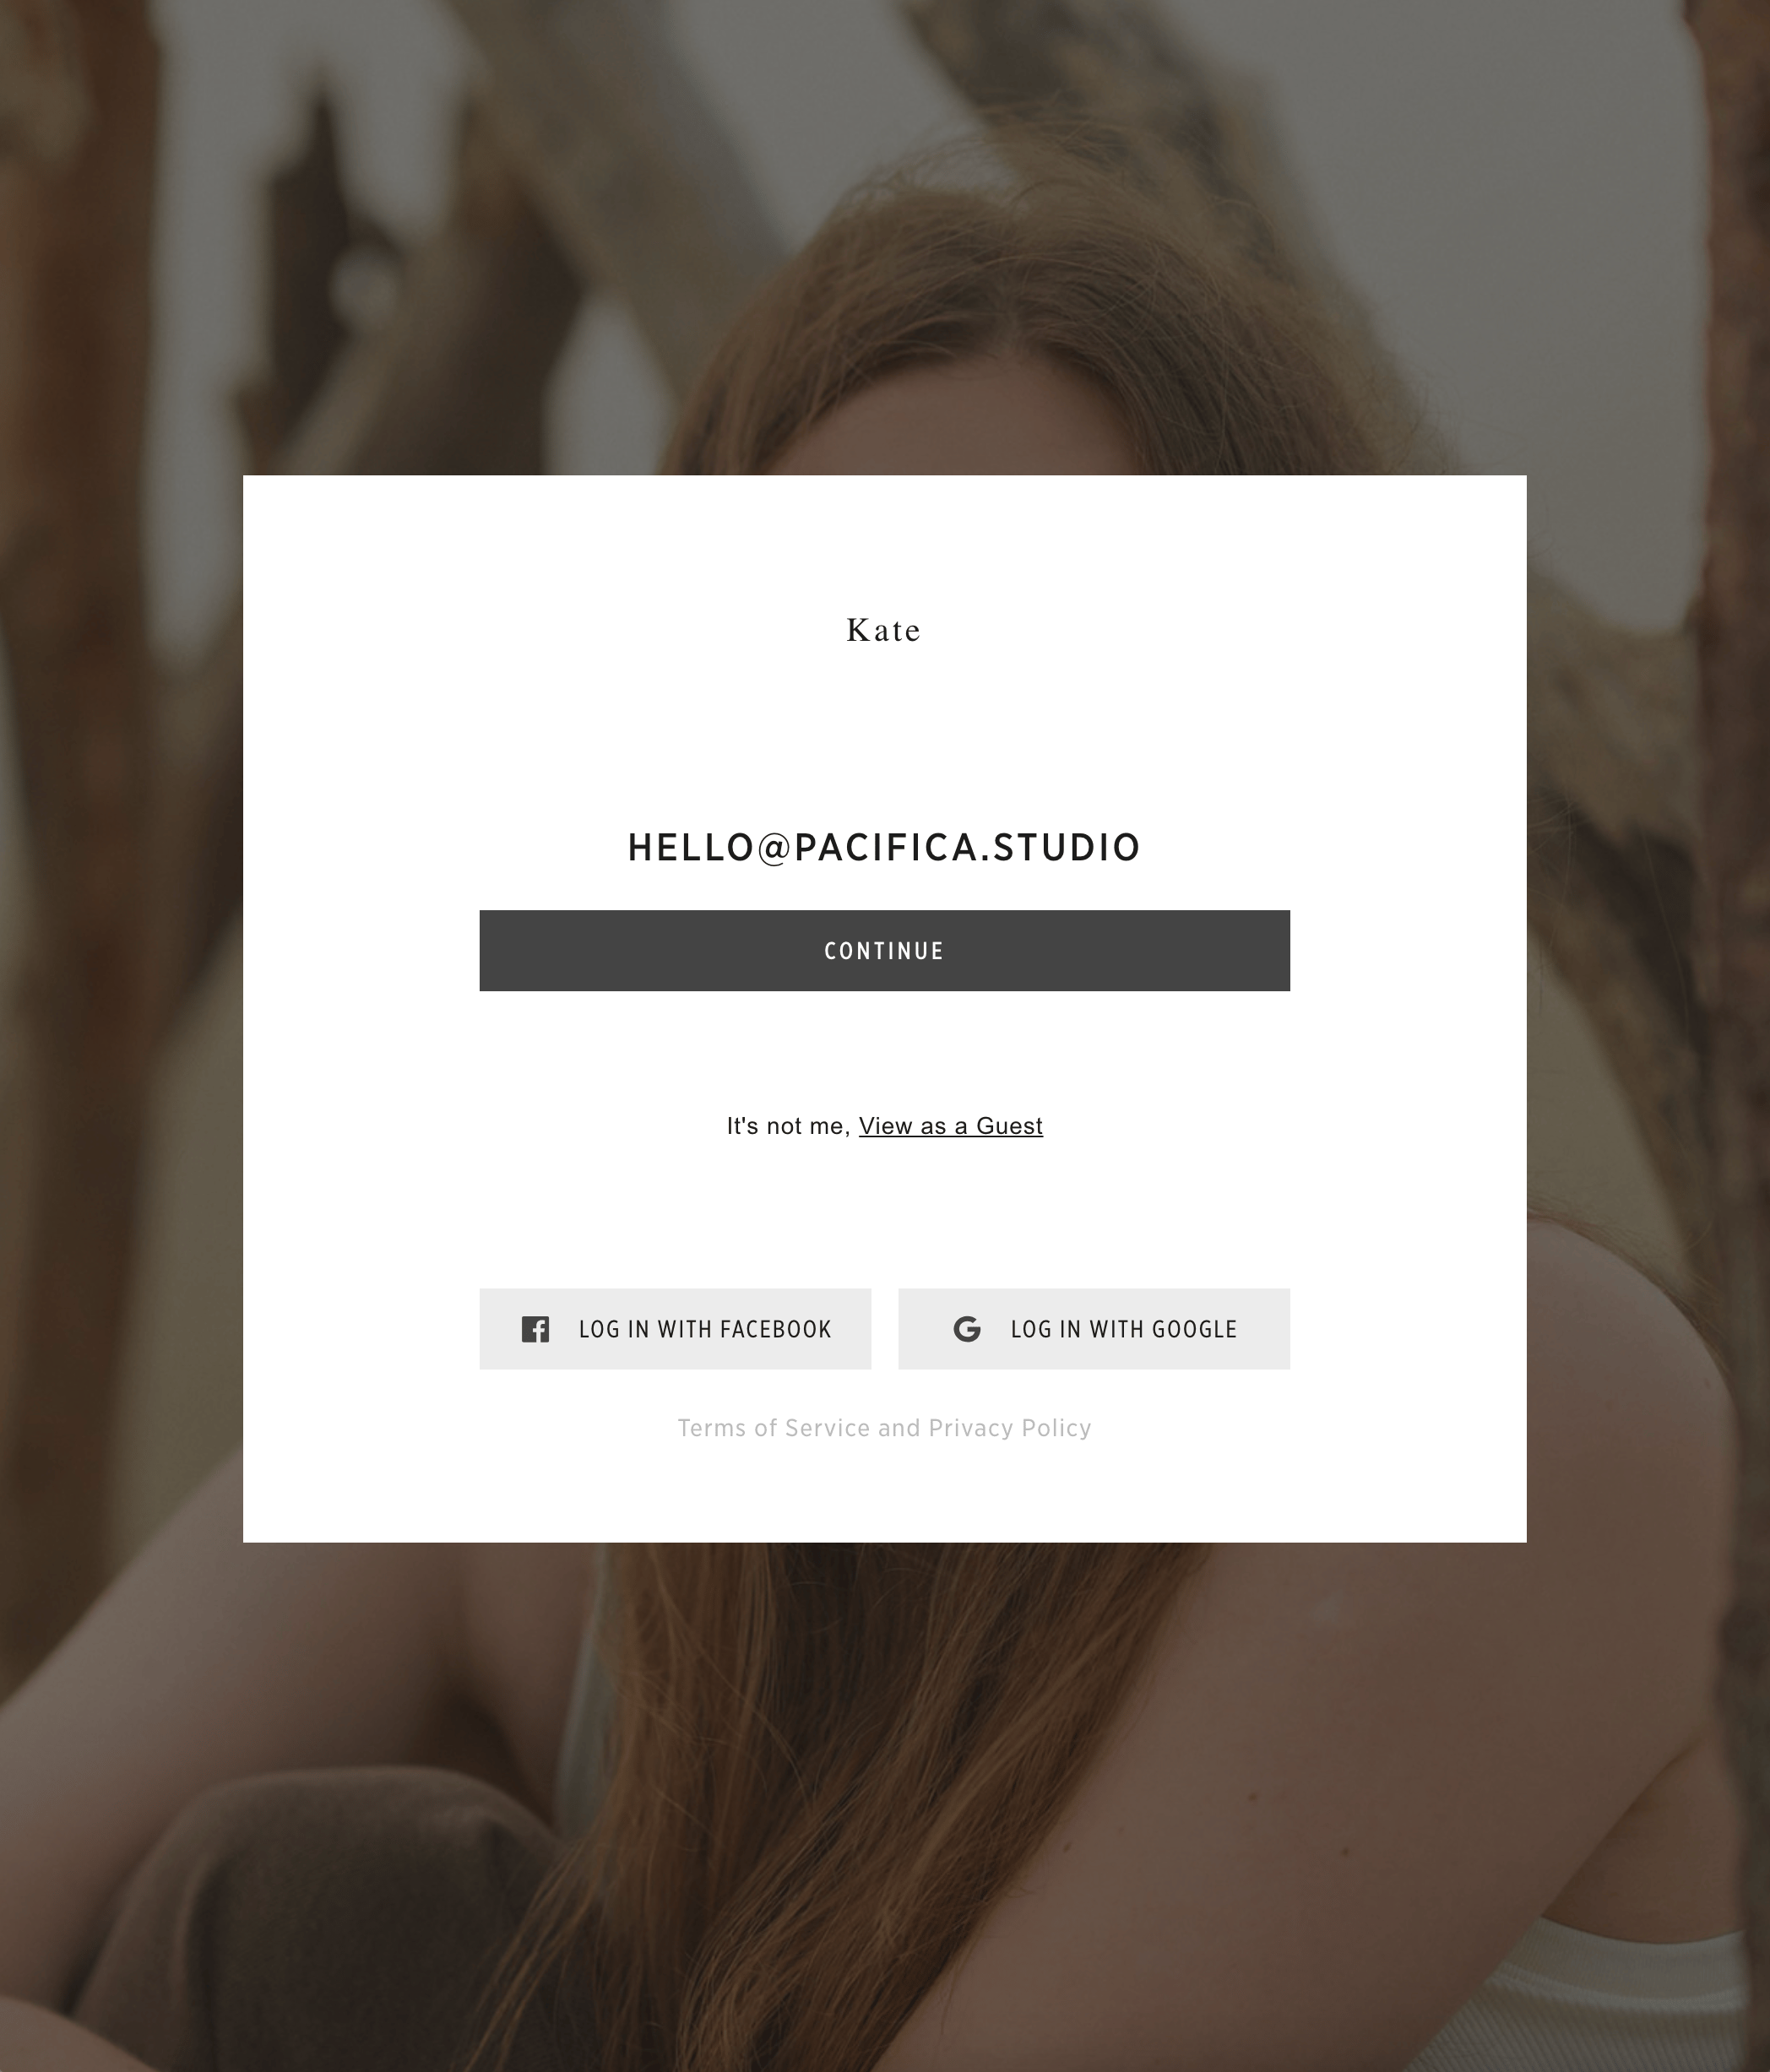
Step 2. Sign in with your appointment email
To access the gallery, use the same email address attached to your appointment. If the system asks you to sign up or log in, continue with that address.
- Use the same email from your bookingThis keeps the gallery connected to the correct session and selection limits.
- Finish sign-up or login before moving onOnce you are signed in, the full gallery and selection tools become available.
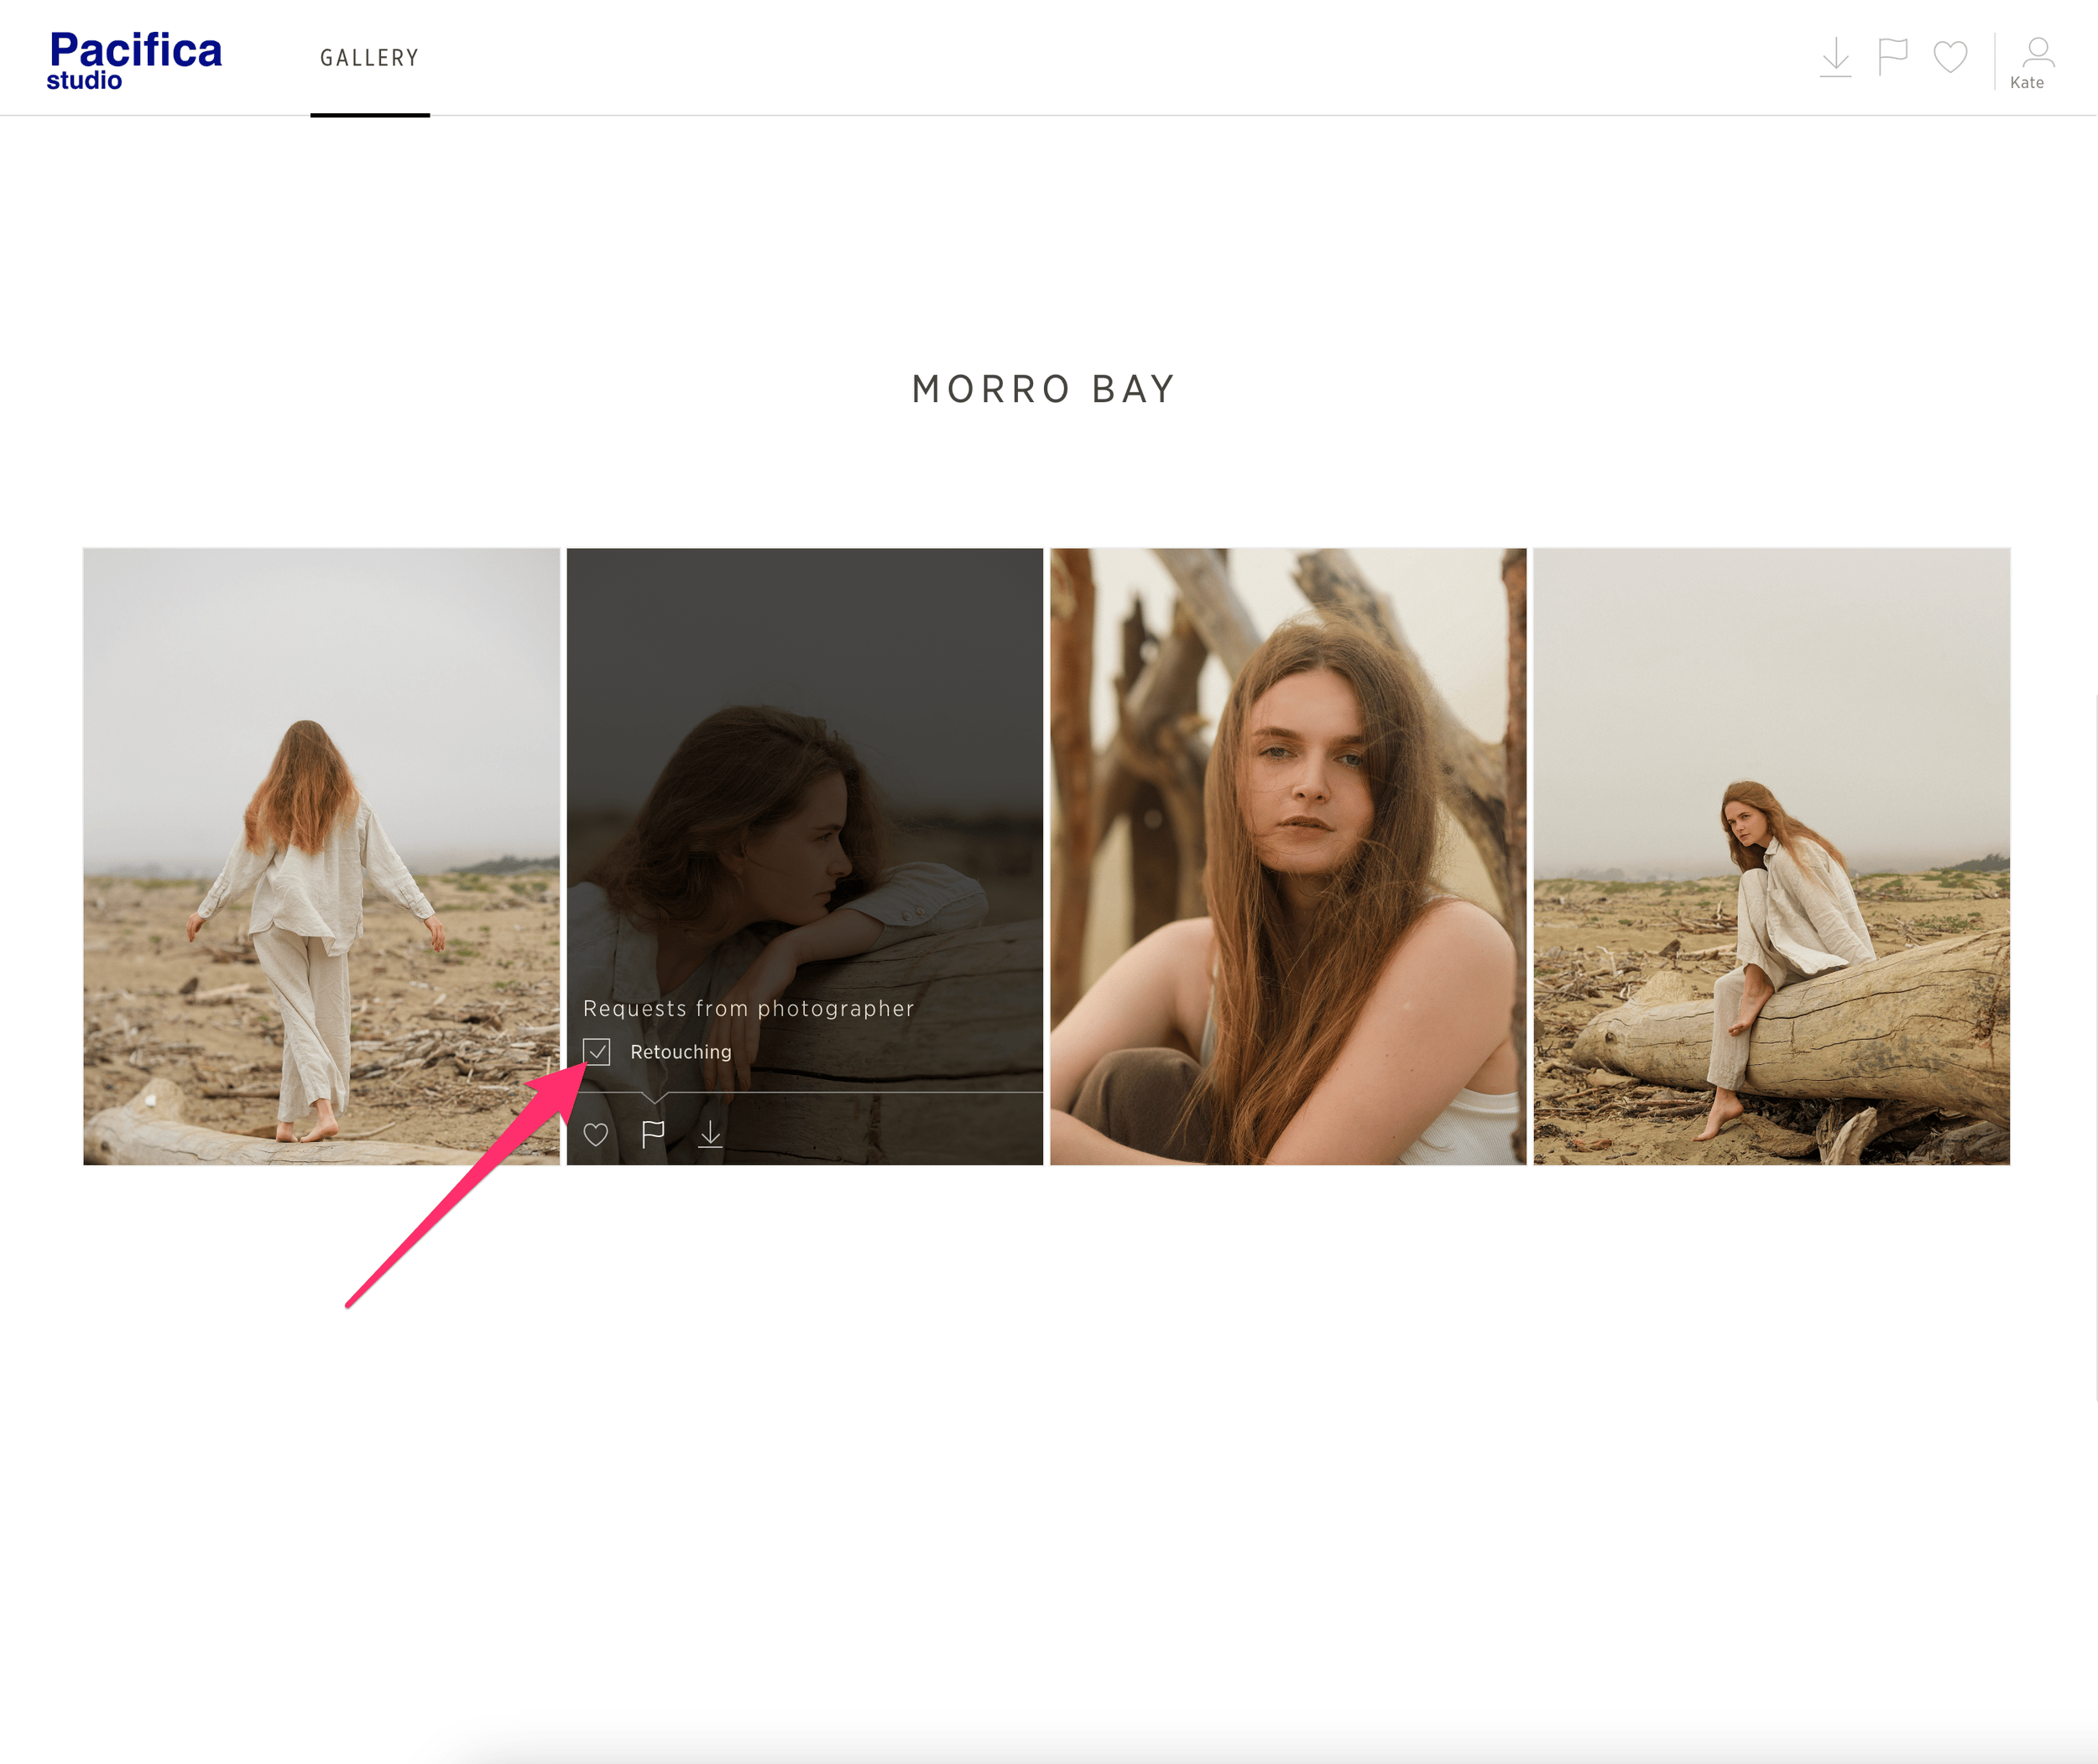
Step 3. Flag the photos you want retouched
Take your time and review all raw photos before making final picks. The gallery lets you flag each image individually for retouching.
- Hover over a photoMove your cursor over the image you want to choose.
- Open the flag icon and check “Retouching”That marks the image as part of your retouching selection.
- Continue until you reach the limitStop once the gallery shows that your allowed number of retouching picks has been used.
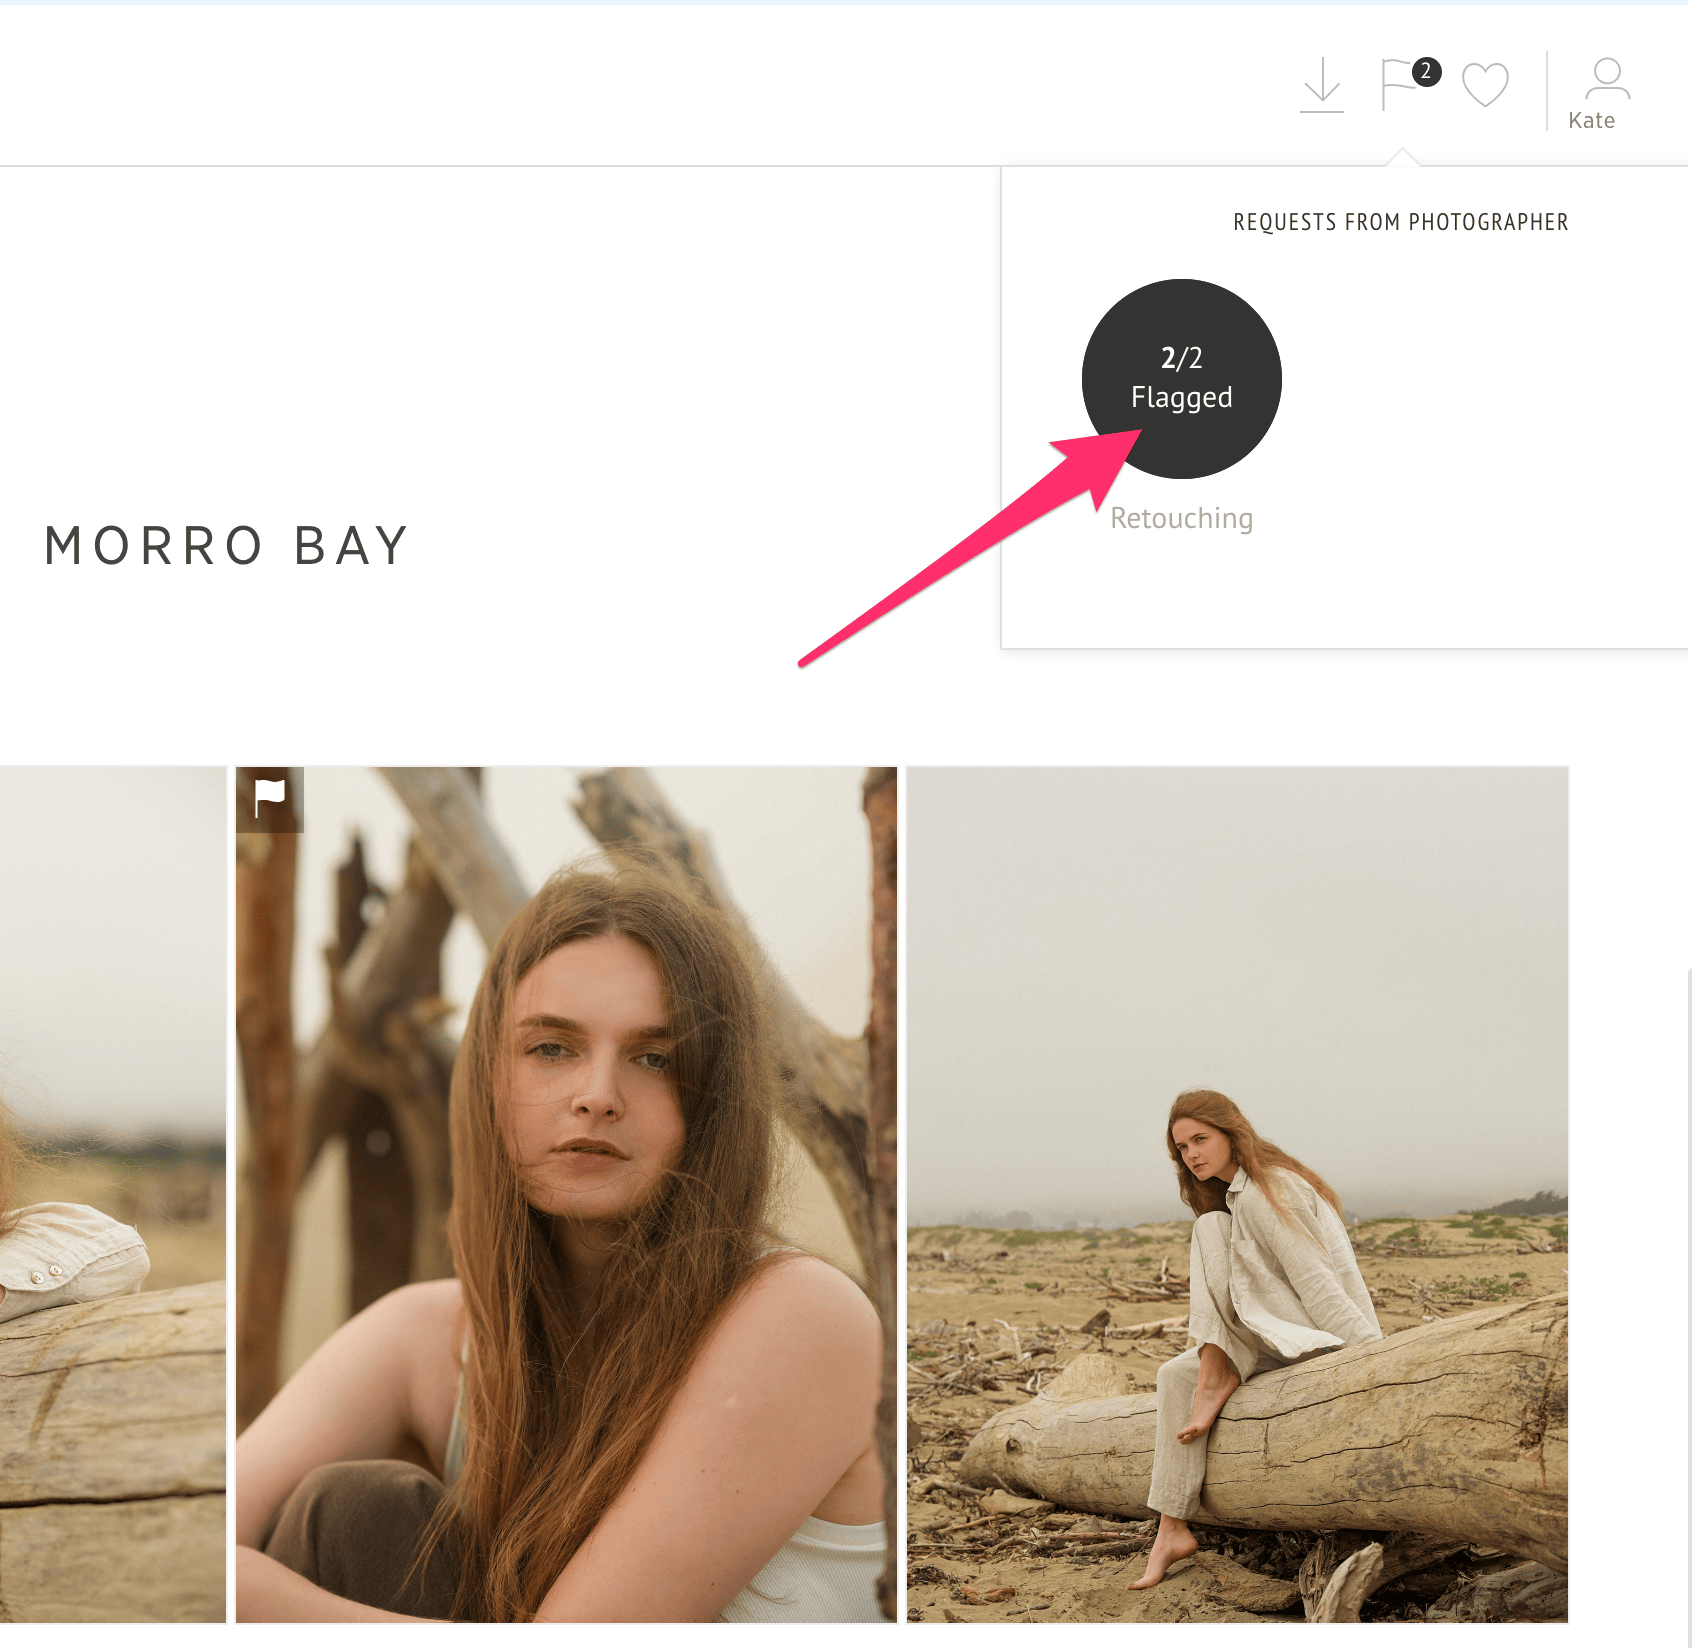
Step 4. Review the flagged set
When your selection is complete, the gallery shows a banner in the top-right corner with the current flagged count.
- Click the “X/X Flagged” buttonThis opens the set you selected so you can double-check every final pick before sending it.
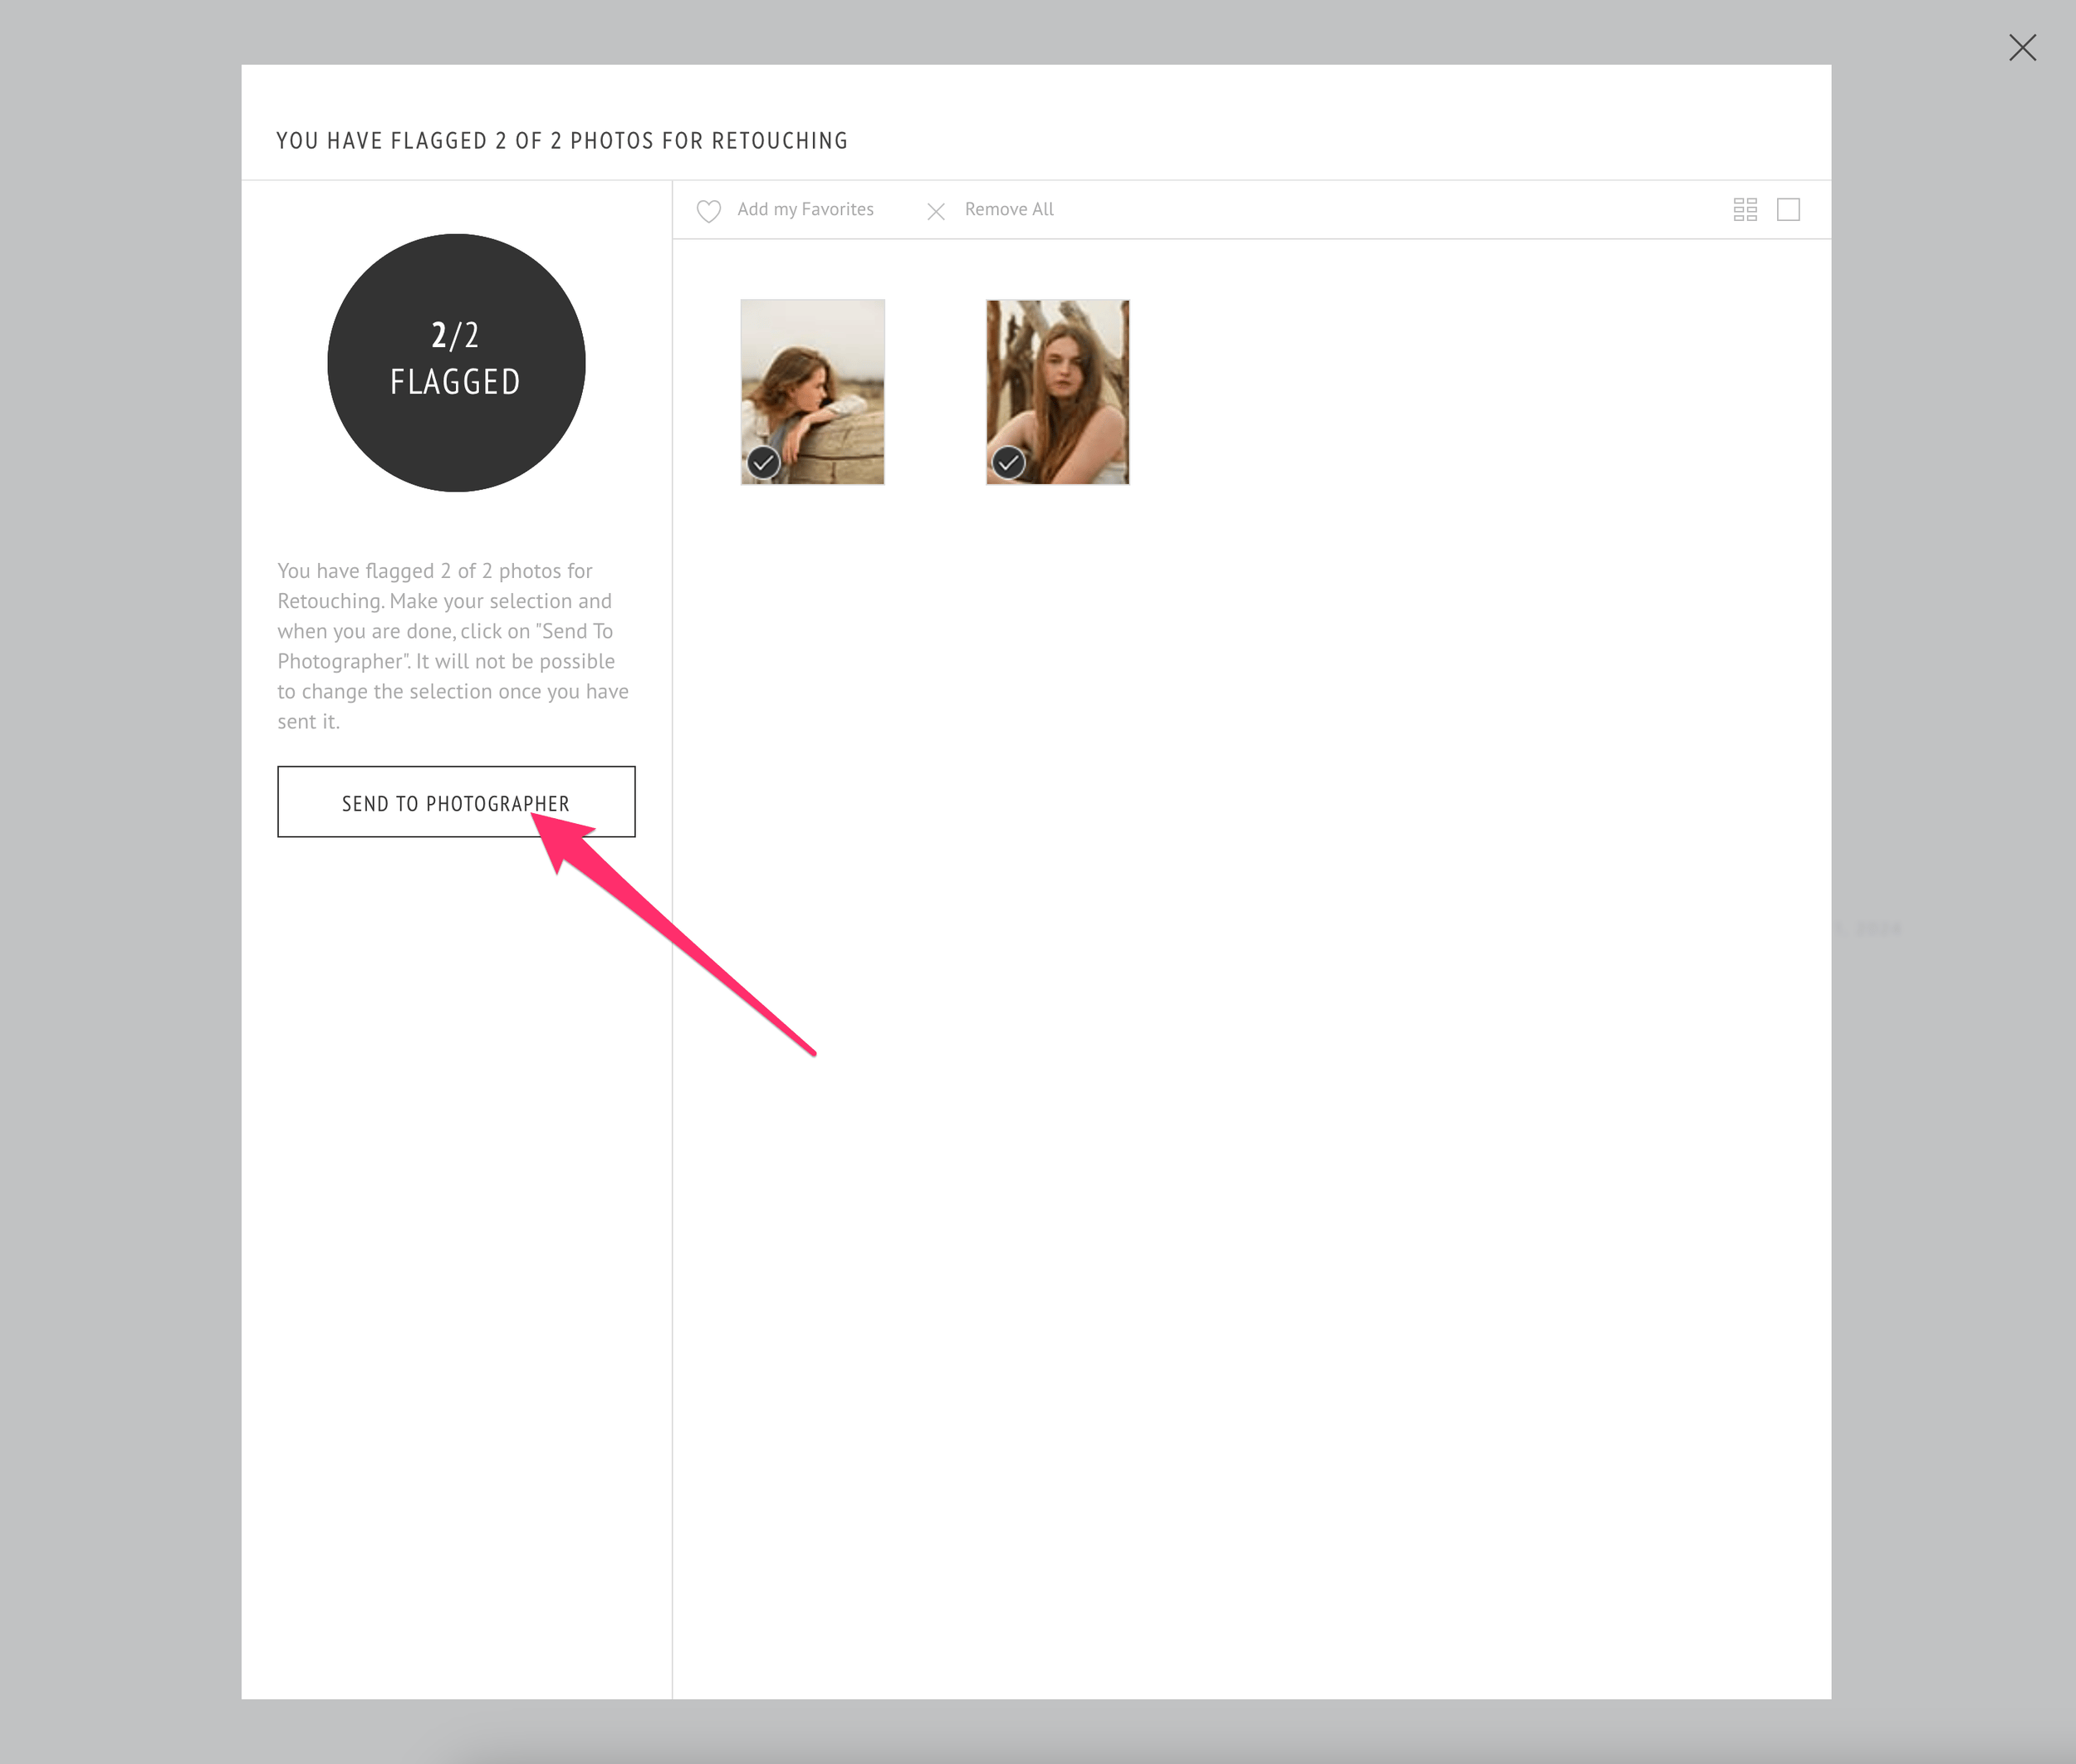
Step 5. Send the final selection
You are almost done. Review the selection carefully, then send it to the photographer.
If you want to add retouching notes or clarify a request, contact us on WhatsApp or by Email.
- Click “Send to Photographer”Submit the flagged set only after you are confident the final selection is correct.
- Relax, your photos will be ready soonOnce the selection is submitted, we can move forward with the requested retouching.
That is the full process: open the email, sign in, flag your retouching favorites, review the flagged set, and send it through.